In the previous lesson, we defined the names of the components of the app. Now we’ll add them to the App component (found in src/index.js), and we’ll organize them inside its JSX.
Open the src/index.js file.
We first import the components we defined, so they are available for usage:
import React from "react";
import ReactDOM from "react-dom";

import "./styles.css";

import AddCategory from './components/AddCategory.js'
import AddBill from './components/AddBill.js'
import NavBar from './components/NavBar.js'
import Chart from './components/Chart.js'
import BillsTable from './components/BillsTable.js'

function App() {
  return (
    <div className="App">
      <h1>Hello CodeSandbox</h1>
      <h2>Start editing to see some magic happen!</h2>
    </div>
  );
}

const rootElement = document.getElementById("root");
ReactDOM.render(<App />, rootElement);
Then we drop the h1 and h2 elements inside the App component JSX, and we can start drafting it to suit our application structure.
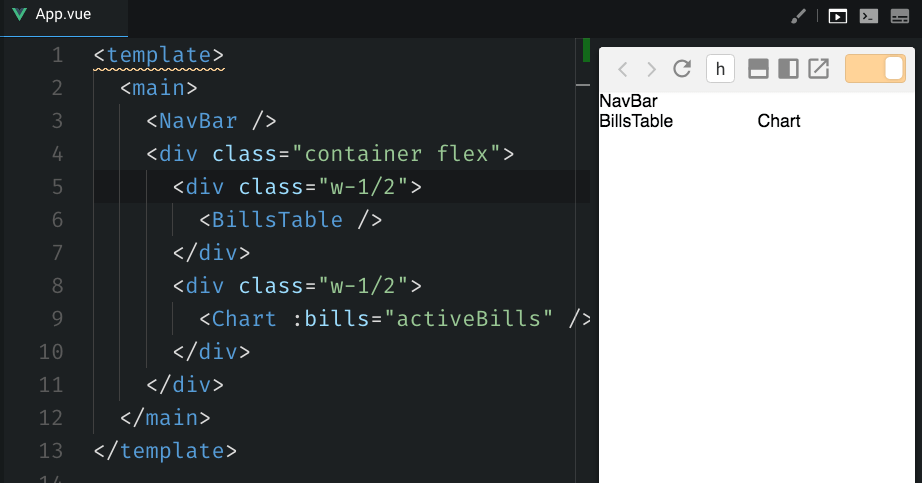
We have the NavBar on top, followed by the main part of the page, separated into 2 parts: the table, and the chart.
function App() {
  return (
    <div className="App">
      <NavBar />
      <div className="container flex">
        <div className="w-1/2">
          <BillsTable />
        </div>
        <div className="w-1/2">
          <Chart />
        </div>
      </div>
    </div>
  )
}
See those classes I added to the div container elements? They are quite clear about what the thing should do: there should be a container element div which uses Flexbox to lay out its 2 child elements. Both those child elements have a w-1/2 class assigned, which means they should each take 50% of the space available.
container, flex and w-1/2 are Tailwind.css classes.
If you’re unfamiliar with it, Tailwind is a cool CSS utility framework. Compared to Bootstrap or other popular frameworks, it does not provide any kind of widget, but instead, it provides a set of classes that do one thing, and they do it well. Check out briefly the introduction on the Tailwind site before going on.
Now, we need to include Tailwind in the project, in order for those classes to work.
How do we do it? There are different ways to include Tailwind in a project. The simplest one is to just use a link tag in your HTML, and it’s also the only way we can do it on CodeSandbox.
Open the index.html file in the public folder and add a link tag to include the Tailwind CSS:
<link rel="stylesheet" href="https://cdn.jsdelivr.net/npm/tailwindcss/dist/tailwind.min.css" />
Now if you add the name of the component in each component file, you will get this structure, as expected: