In the previous lesson we created the first component of the application.
Now we’ll take that component and use it as a base for a grid of pixels, which will be the canvas of our application. Canvas, therefore, seems a good name for the new Component.
Create an empty file in src/components/Canvas.js.
We want the canvas to show a 30x30 grid composed by Pixel components.
The component stores this grid in its state.
How we construct this grid? This piece of JavaScript creates a row of 30 elements:
Array(30).fill()
I want it to be initialized with 0 , so they all default to the our default color, so I use map() for this:
Array(30)
  .fill()
  .map(() => 0)
This works for one row.
For one single row, I could pass 0 as a parameter to fill():
Array(30).fill(0)
I want 30 rows, so I can just repeat this process for the rows as well:
const matrix = Array(30)
  .fill()
  .map(() =>
    Array(30).fill(0)
  )
This is our matrix.
We initialize it in the Canvas component, and use it to initialize the matrix state property using the hooks useState() function:
import React, { Component, useState } from 'react'
//...
const Canvas = () => {
  const [matrix, setMatrix] = useState(Array(30)
    .fill()
    .map(() => Array(30).fill(0)))
}
We are using what we previously called const matrix as the initial value of our matrix.
setMatrix is the function that we’ll use to update the matrix later on.
Now we can render this matrix with the render() method. I use map() on the matrix array, to iterate every row, and for each row I do the same for every column, and return a Pixel component for every single element in the matrix:
import React, { Component, useState } from 'react'
import Colors from '../Colors'
import Pixel from './Pixel'

const Canvas = () => {
  const [matrix, setMatrix] = useState(Array(30)
    .fill()
    .map(() => Array(30).fill(0)))

  return (
    <div className={'canvas'}>
      {matrix.map((row, rowIndex) =>
        row.map((_, colIndex) => {
          return (
            <Pixel
              key={`${rowIndex}-${colIndex}`}
              background={Colors[matrix[rowIndex][colIndex]]}
            />
          )
        })
      )}
    </div>
  )
}

export default Canvas
as usual when outputting components in a loop, we add a key prop (Why? Because React wants it for performance purposes - to render things faster inside our list).
The background prop makes sure we add the color name to the Pixel. Since the matrix stores the color index (an integer from 0 to 3 in this case), we import the Colors array and get the name of the color from it.
Tip: we’re not using the value returned by the map() function, the second time I call it, so I assign it the value _, to mean I don’t actually care about it. It’s just a convention (which I borrowed from the Go programming language, where _ actually means we ignore the parameter).
Now let’s go back to the src/index.js file, and instead of including and then adding the Pixel component to the output, we do do the same with the Canvas component:
//...
import Canvas from './components/Canvas'

function App() {
  return (
    <div className="App">
      <Canvas />
    </div>
  )
}
//...
The last thing we need is to add some CSS to the src/styles.css file to style our canvas and App classes:
.App {
  background-color: #333;
  display: flex;
  justify-content: center;
  align-items: center;
  height: 100vh;
}

.canvas {
  display: flex;
  flex-wrap: wrap;
  max-width: 900px;
}
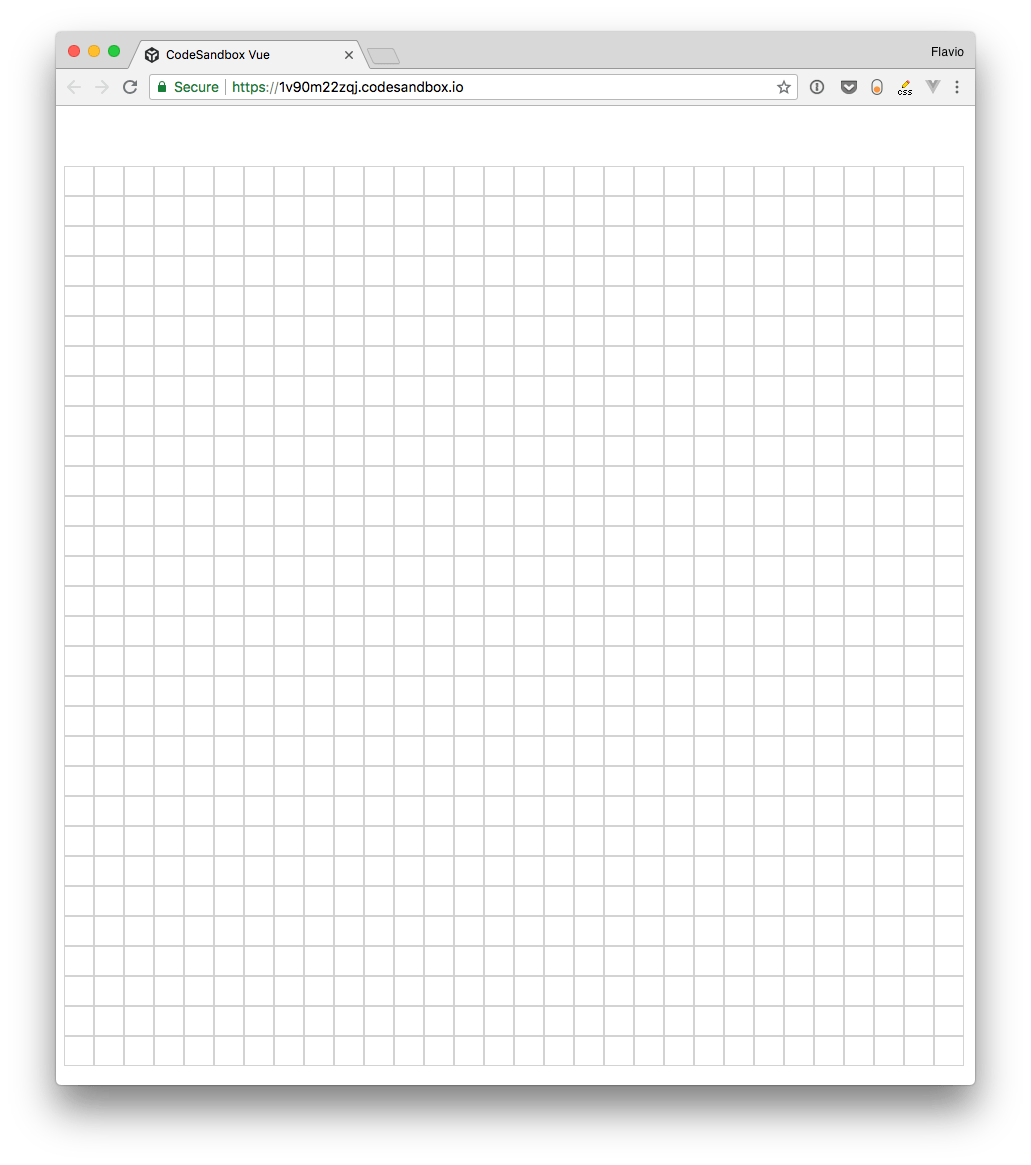
Cool! We can now see the canvas:
Wrapping up
So we went from displaying a single Pixel to composing multiple Pixel components into a bigger Canvas component. So far, so good!
In the next lesson we’ll add a property to the Pixel component to make it have a color!